1. IMPORTANT INFORMATION
1.1. Target group
This guide is written for Abas partners and IT system administrators who newly install Abas or perform an upgrade. IT system administrator knowledge is required for the installation guide.
1.2. Guide
-
This guide describes the entire installation or upgrade process in great detail. What you specifically need to do is marked as "ToDo"!
-
This guide is based on a minimal installation of the operating system RedHat 9 or Debian 12.
1.3. Directory structure
In this guide, we use the following directory structure:
-
/mnt1/ (mount point)
-
/mnt1/tools/(to save the files)
-
/mnt1/abas/ (ERP installation directory)
If your existing installation has a different directory structure, note when reading the guide that the directory names must be replaced by your own in all commands.
1.4. Security information
1.4.1. Customization of the Abas login (user name + password)
In Abas it is possible to log in using only a password and not, as usual, with the combination of user name (or ID) and password. This approach has disadvantages in terms of security and cross-system authentication.
Therefore, be sure to use the system login or SSO login.
In password definitions (see Online Help) you can specify which login you can use to log in.
1.4.2. Customization of the standard passwords from the standard release
You should definitely adapt the standard password of the following password definitions with an Abas login:
-
Maintenance
-
Password: adm
-
Password: euser
-
Password: eauser
-
Password: sy
-
Password: <return> (empty)
1.4.3. SSL encryption of connections
In the Online Help you will find the following important instructions on how to encrypt specific connections:
-
"Encryption of communication between the GUI and the application server"
-
"Configuration of email distribution"
1.4.4. Use of certificates
Self-signed certificates are not recommended for security reasons and are therefore not supported.
2. UPGRADE REQUIREMENTS
This section must be reviewed by the IT system administrator and any missing prerequisites fulfilled. Root permissions are required.
2.1. Operating system
-
The operating system approved for the new Abas version is installed (Abas versions - Supported operating systems can be found on the extranet).
-
We recommend updating the operating system shortly before the Abas upgrade (yum update)
-
Ensure that there is enough hard disk space available. Client databases can temporarily get five times as large during the upgrade as is shown by the "starte_gc.sh -p <client dir>" command.
2.2. Versions prerequisites
2.2.1. Abas
The minimum version for upgrades to Abas 2024.Q3 is Abas 20 (2019r4n20).
Abas PM (if in use)
If your initial version of Abas in which project management (Abas PM) is installed is older than version Abas 20, the following upgrade process must be followed for technical reasons:
1. Abas intermediate upgrade to Abas 20
2. Abas PM intermediate upgrade
3. Abas upgrade to Abas 21
4. Abas PM upgrade
The detailed upgrade procedure for Abas PM is described in the add-on’s documentation.
2.3. Database size
The database of each client currently occupies less than 100 gigabytes:
for i in $(mdir.sh); do du --block-size G -s $i/abasbase/db.dat; done
This is fulfilled if all values in the first column are less than 100G.
Example:
21G     /u/abas/eks/abasbase/db.dat
21G     /u/abas/demo/abasbase/db.dat
2.4. Available storage space
To ensure stable operation of Abas, more disk space than usual is required in this version. You can check in advance whether sufficient resources are available:
mandplatz.sh -p 800 $(mdir.sh)
The result shows OK if there is enough disk space available, otherwise NOSPACE.
Example
mandplatz.sh -p 800 $(mdir.sh)
  Status Partition                  DB=_MB DB+_MB Platz_MB  Mandanten
NOSPACE: /u/abas                     51488 463397   105103  demo eks entw
The expenditures show the space currently occupied by the databases of all clients (column: DB=_MB), the target (column: DB+_MB) and the actual size (column: Space_MB) of the available, free disk space, each in megabytes.
As a prerequisite for the upgrade, the partition in NOSPACE must be enlarged by at least the difference between the target and actual value, in the example 463397 - 105103 = 358294 MByte.
This also ensures the secure operation of the installation with version Abas 2024.Q3.
2.5. Internet access
-
Internet access must be possible, as the erpOSPrepare.sh script retrieves and updates the package lists there.
-
If you have any problems, a guide is provided in the "Troubleshooting" chapter under Problems with internet access.
2.6. Java is installed
-
You must specify the Java path when calling the erpOSPrepare.sh script. The erpOSPrepare.sh script checks if Java has been installed. The script does not run without Java.
-
We recommend using the OpenJDK on the Abas server.
-
If Java has not been installed yet, you can follow the guide under Install Java (as the user root).
-
A JDK must be installed. A JRE is not sufficient (otherwise the AJO interface cannot be generated).
-
Java version 17 must be installed. Other Java versions are not supported.
2.7. Docker and Docker Compose standalone are installed
IMPORTANT INFORMATION:
-
You must install Docker and Docker Compose standalone from Abas Version 2024.Q3 for Abas components, Multisite (RabbitMQ), Abas Service Planner, and Abas PM to work.
-
Docker CE (Community Edition) and Docker Compose standalone must be installed before calling the erpOSPrepare.sh script, as the script adds the required users to the Docker group.
-
Note on RedHat:
-
The packages for Docker provided by RHEL cannot be installed.
-
You can identify an incorrect Docker by the following in /etc/group:
dockerroot:992 -
For correct installations, the name is docker in /etc/group.** The Abas installation routine checks this name during the installation.
-
-
If Docker was installed incorrectly, it must be reinstalled!
-
There can only ever be one Docker installation on the server. If you reinstall Docker, you must remove the previous Docker installation first.
-
The standalone version of docker-compose must be installed (see Installation Docker Compose standalone)
-
Docker must be on the data partition.
(Instructions for the change can be found under Change the Docker root directory).
In the appendix you will find the instructions Installation Docker CE (Community Edition) and Installation Docker Compose standalone as well as all other necessary steps if you have not yet installed them.
2.8. Skip the download of current components
The installation archives of the Abas version to be newly installed also includes the following components, among others:
-
GUI
-
RabbitMQ
At the time of delivery, these components are up to date. However, at the time of installation/upgrade there may already be newer versions of these components available on the Abas Artifactory.
Therefore, an attempt is made during the installation/upgrade to get a current version from the Artifactory so that the latest version of these artifacts can be installed.
If you want to skip the additional download of these components, this is possible using the following shell variables:
SKIP_LOAD_ARTIFACTS=1 |
No component is updated automatically (automatically includes all following configuration switches). |
DO_NOT_LOAD_GUI=1 |
The current artifacts of the GUI are not downloaded. |
DO_NOT_INSTALL_RABBITMQ=1 |
The current artifacts of RabbitMQ are not downloaded. |
DO_NOT_LOAD_GUI=1 ... install-unix.sh
DO_NOT_LOAD_GUI=1 ... upgrade-unix.sh ...
2.9. A test upgrade provides security
A test upgrade on a copy of your installation is indispensable! This allows you to carry out the required rework without time pressure during regular support hours.
The upgrade support team can only provide support on the actual upgrade process. Rework required for customizations should be coordinated with your Abas partner.
A test upgrade can provide you with further important information:
-
Test, preparation and verification of the preparatory work and rework. This will significantly reduce the rework time when the real upgrade is performed.
-
Exact knowledge of the runtime of the test and upgrade phase
-
Possibly, you can already be trained in new functions using your own database.
2.10. Read the innovations and expansions information, plan rework
When a new version is installed, additional new features will be available which are described in the innovations and expansions information.
Please take note of the items which are marked with an "Attention" flag. They will affect your installation after the upgrade and some of them require manual rework. This particularly concerns customizations of variables, keys, screens and FOPs.
After the upgrade required rework will be listed in the registration notice (registration fax) in the "Upgrade INCOMPLETE" section. The exact error, usually the screen generation, is named. Abas cannot be operated before this error list has been completely processed!
|
To simplify the upgrade follow-up work, Abas automatically creates a log of the variable changes between the source and target version in the Messages/vardiff.out file during the upgrade. You can find further details under the following link. |
2.11. Prepared tables of variables records are deleted by an upgrade
Prepared tables of variables (Vartabs) cannot be processed by the upgrade. Therefore, they will be deleted. In case of doubt, perform pending reorganizations before the upgrade.
3. DOWNLOAD AND EXTRACT THE ERP INSTALLATION FILES
This chapter will show you which files you must download, where they are copied to and how they are extracted.
3.1. ToDo: Retrieve files from the Abas download server (Artifactory)
Since July 2019 the installation files can be found on the Artifactory server (registry.abas.sh). It can be accessed using the same login data as for the Abas extranet. On the extranet, you can find a detailed description on the Download of Abas distributions. If problems occur upon login to the Artifactory server, you have probably not yet clicked the Transfer access data button on the extranet.
You must download the following installation files (XX represents any number):
-
erp-basepack_2200r8nXX.tgz
-
erp-x86_64_linux_2200r8nXX.tgz
|
NOTE: |
-
Always use the most up-to-date amendment for upgrades in order to be able to make use of the most recent error corrections.
-
If you would like to use an older amendment, please read the bugs fixed for your preferred version beforehand.
3.2. ToDo: Copy files to the installation server (as the user root)
# Installationsverzeichnis erstellen und Rechte anpassen
mkdir -p /mnt1/tools/abas
chmod 777 /mnt1/tools/abas
Copy the installation files from the Artifactory server to the /mnt1/tools/abas directory.
Information on the direct download of the files using the wget command can be found on the extranet under Download of Abas distributions.
Note that wget must be installed. If wget does not work, you can find information under Problems with internet access
cd /mnt1/tools/abas
# Bei user= Ihre Mail-Adresse vom Extranet eintragen !!!
# Passwort wird nach Aufruf abgefragt; Ihr Extranet-Passwort eingeben
# Versionsnummer anpassen !!!

wget --user=Ihre.ExtranetEmail@IhreDomain.com --ask-password https://registry.abas.sh:443/artifactory/abas.downloads/versions/2200r8n01/erp-basepack-2200r8n01.tgzwget --user=Ihre.ExtranetEmail@IhreDomain.com --ask-password
https://registry.abas.sh:443/artifactory/abas.downloads/versions/2200r8n01/erp-x86_64_linux-2200r8n01.tgzcd /mnt1/tools/abas
# Entpacken der Installationsdateien im Verzeichnis /mnt1/tools/abas
tar -xzf erp-basepack-2200r8n01.tgz
tar -xzf erp-x86_64_linux-2200r8n01.tgz4. CONFIGURATION OF ABAS
4.1. Configuration levels of Abas
The configuration of the release version has two levels.
The first configuration level includes the erpOSPrepare.sh script, which ensures the system requirements on the Abas server.
The erpOSPrepare.sh script, in turn, generates the "abasinst.env" configuration file, which is required for the subsequent call of "install-unix.sh" or "update-unix.sh".

If no "custom.config" is specified, the configuration is created exclusively from the standard configuration. In this case, the "abasinst.env" file only contains the values from the standard configuration.
If the installation of Abas (install-unix.sh) is called without a configuration file, the configuration is also determined from the standard configuration.
In the case of an upgrade, note that the specified HOMEDIR is evaluated first. Therefore, some variables (e.g., the HOMEDIR or the s3 and client user) are determined from the current installation and cannot be overwritten.
|
NOTE: When upgrading, system relevant parameters cannot be overwritten by a custom configuration or the standard configuration! |
4.2. The standard configuration
/mnt1/tools/abas/CDftp-2200r8n01/installConfig
abas.config
cloudconnect.config
dashboard.config
dms.config
fulltextsearch.config
helpsearch.config
icedaemon.config
rabbitmq.config
4.3. Adapt the configuration
/mnt1/tools/abas/CDftp-2200r8n01/custom.config
Thus, most of the values from the standard configuration can be overwritten.
|
NOTE: Never change the standard release! These changes will not be saved after the installation/upgrade and will be lost for further installations and configurations! This may lead to unexpected problems later in the installation/upgrade process and require complex analysis. |

Format of the configuration files
The format chosen for the configuration files included in the release version is "yml". With this format, the indentation of the individual parameters is important. Only spaces are allowed (no tabs). Each indentation level is later a part of the variable name.
Please remember this when creating or editing such files.
ABAS:
    DIRNAME:
        MOUNT: /mnt1
        BASE: abas
        S3: s3
    PORT:
        EDP: 6550
        DATMOD: 48392
ABAS_DIRNAME_MOUNT=/mnt1
ABAS_DIRNAME_BASE=abas
ABAS_DIRNAME_S3=s3
ABAS_PORT_EDP=6550
ABAS_PORT_DATMOD=48392
5. PREPARE UPGRADE OF ABAS
This chapter describes the preparations for an installation or an upgrade of Abas. As of Version 2017r4 the erpOSPrepare.sh script facilitates manual preparatory work. It checks the fundamental installation or upgrade requirements, among other things. This chapter will show you what the script does, how it is called and which changes it makes to the system.
5.1. Configure the ssh daemon
ToDo: Check sshd_config (as the user root)
The script erpOSPrepare.sh checks the settings of sshd_config upon startup.
It cancels at the end if the StrictModes setting in the file is not set to "no".
Why set "StrictModes no"?
StrictModes is used to check the permissions of the user. As Abas uses the group permissions to a great extent, StrictModes must be set to "no". With "StrictModes yes", the client users have no access to Homedir files, even though they belong to the same group (abas).


5.2. Prepare the installation with the erpOSPrepare.sh script
The following sections describe exactly what the script does. If errors occur, you can find further explanations and remedies under Troubleshooting erpOSPrepare.sh.
You can find detailed information in the appendix:
ToDo: Call erpOSPrepare.sh script and check monitor output (as the user root)
The following section describes what the script does after being called . You can call the script without concern. After the call you will receive a monitor display with information to review or ToDos. The script will not actually be run until you actively confirm with "y" (yes). To just see what the script does, you must cancel with "n" (no)!
IMPORTANT:
-
For a clean install, use the script’s install option: "-i"
-
For an upgrade, use the upgrade option of the script: "-u".
-
If you have never worked with the script before, be sure to read the sections , Overview: What does the erpOSPrepare.sh script, sample calls and the explanation of the parameters in the appendix!
-
Executing the command will only check your system environment. The script does not yet change anything. The script displays what it will do on the monitor. Thoroughly review the monitor display!
-
Pay particular attention to the lines marked with "*" and "!" . The users and groups marked in this way will be overwritten. If you do not want this to happen, you must assign the parameters new values.
-
Only when everything is okay, confirm with "y" (yes) and thus start the script!


Script checks wget
If the script freezes when checking "wget" and outputs the message "Try to install bootstrap package "wget" …", cancel the script. Check your internet access. You will find information about this in the Troubleshooting chapter, section problems with access to the Internet (wget, curl, …).
Script checks Selinux
The /etc/selinux/config file is checked. If selinux is not set to "disabled", you will get this output:


You must do the following, if the above output is displayed:
reboot
ssh root@ihr_servername
Note that the server takes some time to restart. Check whether the internet connection still works after the reboot.
cd /mnt1/tools/abas/CDftp-2200r8n02/bin/
ABAS_JAVAPATH=/mnt1/java8 ./erpOSPrepare.sh -i
cd /mnt1/tools/abas/CDftp-2200r8n02/bin/
ABAS_JAVAPATH=/mnt1/java8 ./erpOSPrepare.sh -u -h /mnt1/abas/s3
Screenshots of the script call
Do not yet confirm the entry at the end of the script with "y"! Read the following explanations first!


Important
If you have a "D" in the Docker root dir line, exit the script call using "n".
Edit the Docker root dir as described in the Change Docker root directory section.

In this case, multiple system services are configured in _/etc/services _ on port 6550.
These can be Abas services (EDP) or other system services. The configuration script cannot determine this, as the name of the system service ("EDP" in this case) may have been changed.
The following message is displayed: "WARN: multiple services found in /etc/services!".
Check the ports and system services in /etc/services.
Ensure that there are no competing services on the specified port and change the configuration accordingly (port number in /etc/services and Abas variable).
ToDo: Start the installation process with erpOSPrepare.sh
|
Only run the script using "y" when you have checked Mountpoint, Javapath, Docker root dir and all lines with an asterisk and exclamation mark. Check whether Docker, Docker Compose standalone and Java are installed. You will save yourself time-consuming rework! |
The following is done by the erpOSPrepare.sh script after you confirm with "y":
-
The script starts checking the installation requirements. It does NOT install Abas!
-
Missing packages are installed and users, groups and ssh keys are created.
-
In the following screenshot, you see the output by the script while checking the required packages.
-
The /mnt1/abas/ directory is created.
-
Packages which are missing (marked missing!) are installed if you confirm the query with "y".


|
Important Do not cancel the script! The missing packages are installed at line " == yum install …". This takes several minutes! |
Note:
-
As of version Abas 20 (2019r4), also the packages jq, sqlite3, locate, and git are installed automatically.
-
You can find all installed packages as well as possible errors in the log file:
/tmp/checkPackage.log -
Check in the log file or by scrolling up if all packages were actually installed by the script. If a package is marked as "missing" at the end of the script run, you must install it manually.
You can only see the following screenshot if you scroll up.


Note on new installation:
All users are always newly created. Already existing users are deleted beforehand (users were previously marked with a *)!
Note on upgrade:
Only the new users are created. For all system users required for operating Abas (here, for example: s3, erp, demo, leer), it is expected that they already exist in the system. These users were previously marked with a *. These users are not newly created.
The passwords for newly created users are recorded in:
/mnt1/tools/abas/CDftp-2200r8n02/Messages/erpOSPrepare.passwd (if you did not deactivate the password assignment using the environment variable REMOVE_PASSWD=1 when calling the script).


A detailed description of which files and services have been executed or edited can be found in the next section Script created or edited the following files.
In the last line of the script output on the monitor, you can find the command for starting the Abas installation or upgrade process. Do not start the installation/upgrade until you have read the following section up to the chapter Upgrade Abas.
Messages/Notifications during the erpOSPrepare.sh script run


-
Java, Docker and Docker Compose standalone are "third-party tools". You must install these yourself! If a tool is marked as "missing", you must install it now.
-
You require Docker and Docker Compose standalone to use Multisite (RabbitMQ), Abas Service Planner and Abas PM to use Dashboard.
Information on error messages can be found under Troubleshooting erpOSPrepare.sh.
Description of the files created or edited by the erpOSPrepare.sh script
-
/mnt1/abas/abasinst.env (configuration file)
-
You can find detailed information about the file in the next section, where the actual installation of Abas begins.
-
/etc/security/limits.conf has been modified:

-
/etc/services:

-
/etc/group
Missing groups have been added (docker, …) -
/etc/sysconfig/selinux
selinux has been set to disabled, as the ssh keys can otherwise not be created-
SELINUX=disabled
-
-
/etc/sysctl.d/abas-protected_hardlinks.conf
File created with entry:-
fs.protected_hardlinks=0
-
-
/etc/sysctl.d/abas-disable_ipv6.conf
File created with entries:-
net.ipv6.conf.all.disable_ipv6 = 1
-
net.ipv6.conf.default.disable_ipv6 = 1
-
net.ipv6.conf.lo.disable_ipv6 = 1
-
Possibly missing subdirectories were created and assigned the correct rights in the "abas" directory


-
In each home directory of the users (demo, dms, erp, etc.), an .ssh directory will be created with the required keys, insofar as these did not already exist.
-
The file name "abas_install" is used to avoid overwriting any existing ssh keys.
The newly created files, such as ssh keys, cannot be deleted, as they are necessary for the administration of the Abas installation!
Using the created ssh keys, the following user changes can be performed on the Abas server:-
root → s3,dms,clients,…
-
s3 → bapps,dms,clients,…
-
Every user to themselves (s3 → s3)
-
From outside to the Abas server is possible with the users created by the script. If you want to allow access from outside, you must take additional action and add the required (external) public keys to the respective user under "authorized_keys".
These ssh keys are primarily required for the installation and upgrade. Additionally, they are necessary for administrative scripts (RabbitMQ etc.) as well as for system scripts (e.g., the table of variables reorganization must be able to start and stop RabbitMQ and IceDaemon via a system service).
5.3. DATA INTEGRITY OF THE CLIENTS
The data integrity of the clients must only be checked in the case of an upgrade. This step is not necessary for new installations.
ToDo: Emsure the data integrity of the clients
Check the integrity of the real client database by running a garbage collection for both logs:
-
starte_gc.sh <clientdir> 0 2>Messages/gc_0.err; echo Erfolg=$? # Log 0 GC
-
starte_gc.sh <clientdir> 1 2>Messages/gc_1.err; echo Erfolg=$? # Log 1 GC
6. UPGRADE ABAS
This chapter will show you the exact Abas upgrade process. The installation or upgrade process does not create any users in the system. This is exclusively done via the erpOSPrepare.sh script or the subscripts erpUserPrepare.sh and erpSSHPrepare.sh called by this script.
NOTE:
-
When the test phase has been finished, error messages and warnings can be found in the file
-
install.mld # Error messages. If the test phase fails, you can find further information here.
-
install.wrn # Warnings and information. Warnings never cause an upgrade cancellation.
-
-
The current status of the upgrade can be queried with update_status.sh
The following must be done before starting the Abas installation.
6.1. ToDo: Log in as the user s3
ssh s3@IhrServername
eval $(sh ./denv.sh)
echo $?   # Muss als Ergebnis 0 liefern!
6.2. ToDo: Check abasinst.env (as the user s3)
The erpOSPrepapre.sh script from the previous chapter generated a configuration file.
.Sie können diese Datei prüfen und bei Bedarf ändern:
vi /mnt1/abas/abasinst.env
-
The file includes your custom configuration and is required for the subsequent Abas upgrade at the end.
-
The ports used are listed in the file, for example.
-
You can define whether Abas DMS, RabbitMQ, etc. should also be installed.
0 - means will be installed
1 - means will not be installed
Examples:
DO_NOT_INSTALL_RABBITMQ: 0 |
#RabbitMQ will be installed |
DO_NOT_INSTALL_ICEDAEMON: 0 |
#iceDaemon will be installed |
WARNING
You cannot change the DIRNAMES and USERNAMES in the CLIENT section. If you want to add a new name or client, you must do this before or after the upgrade using the familiar administration scripts.
-
Information on special case: If the component Abas DMS is set to "0" (i.e. it is to be installed), the following applies:
-
For Abas DMS, only the functionality of the required user is tested.
The required shared directory and the Samba configuration are created. The dms user is added to Samba.
smbdms.conf is created, but still has to be added manually to Samba as include.
No further installation, for example of Habel, is carried out.
-
6.3. ToDo: Start the upgrade by calling update-unix.sh (as the user s3)
-
Check whether you are actually in the s3 directory as the user s3!
"echo $HOME" must show you /mnt1/abas/s3 or the Homedir path you use, for example, /mnt1/abas/s3. -
At the end of erpOSPRepare.sh you were shown how to start the upgrade process using the update-unix.sh script.
# statt CDftp-2200r8n02 Ihren Pfad eingeben!

CUSTOM_CONFIG_YML=/mnt1/abas/abasinst.env JAVAPATH=/mnt1/java8 /mnt1/tools/abas/CDftp-2200r8n02/ install-unix.sh
If the process gets stuck at "Load abas package list …", you can check the log file to determine where the process is stuck:
/mnt1/abas/s3/tmp/checkPackage.log
6.4. ToDo: Press Return to confirm the upgrade directory (Homedir)

Then upgrade is performed in different phases:
-
Preparation phase
-
Test phase
-
Upgrade phase
-
Rest phase
|
NOTE: You must start the test phase and upgrade phase one after the other! |
The preparation phase and the test phase run after the first call of "update-unix.sh".
After successful completion of the test phase, you must start the upgrade phase by calling "update-unix.sh" again.
The rest phase is started automatically at the end of the upgrade phase!
Each phase has a certain range of sections, which are specified by numbers. The section numbers can be directly allocated to a certain phase:
Check phase Homedir: |
H_SECTION |
1 - 200 |
Check phase clients: |
C_SECTION |
1000 - 1060 |
Upgrade phase Homedir: |
H_SECTION |
201 - 700 |
Upgrade phase clients: |
C_SECTION |
1065 - 1300 |
Rest phase Homedir: |
H_SECTION |
701 - 999 |
Rest phase clients: |
C_SECTION |
1301 – 1500 |
6.5. ToDo: Start the preparation phase and test phase
Preparation phase section
During the preparation phase, the server is prepared for the upgrade process. This includes, for example:
-
Unpacking the installation archives
-
Downloading a current GUI
-
Removing the files of a previous upgrade
-
Checking the users, operating system and programs
Test phase section
H_SECTION |
1- 200 |
Setting up the temporary new program environment in $HOMEDIR/vneu |
C_SECTION |
1000-1060 |
Test phase without writing in the clients (except for to the subdirectories startdat and zieldat) |
During the test phase, the system, the Homedir, and the individual clients are tested. The upgrade carries out tests to ensure that the upgrade can run without problems.
During the test phase, Abas can be used as usual.
Required preparations for Abas can be made any time during operation.
After completing the test phase, the upgrade will stop as planned.
# statt "/mnt1/..." und "CDftp-2200r8n02" Ihren Pfad verwenden!
CUSTOM_CONFIG_YML=/mnt1/abas/abasinst.env JAVAPATH=/mnt1/java8 /mnt1/tools/abas/CDftp-2200r8n02/update-unix.sh
NOTE:
-
Start the test phase in good time before the upgrade phase. Then you have enough time to react to error messages and to eliminate possible incompatibilities.
-
Do not wait too long with a client/an installation after running the test phase. The longer the time between the test phase and the upgrade phase the greater the probability that incompatibilities in the system will occur again, which may prevent a successful upgrade.
-
If a new version will be available by the upgrade date, you can use it without any problems. When the test phase of the new version is started, you will be asked if the already started upgrade is to be deleted. Then the test phase for the new version will be started.


6.6. ToDo: Start the upgrade phase and rest phase
6.6.1. Upgrade phase section
H_SECTION |
201- 700 |
Installing programs of the target version |
C_SECTION |
1065-1100 |
Preparation for the upgrade, writing a check point into the database |
C_SECTION |
1101-1300 |
Upgrading the database |
During the upgrade phase, the actual upgrade of the Homedir and individual clients takes place.
The upgrade phase must not be interrupted.
IMPORTANT:
There are sections that are classified as "critical" and must run without errors. If a "critical" section fails, the upgrade is lost in any case. A critical section cannot be repeated!
The upgrade attempts to complete each phase in all clients. Only when the upgrade phase was successful in all clients, the rest phase is started.
For example, if the rest phase fails in C_SECTION=1420 (configuration of AJO interface) in a client, the process is only canceled in this client.
The rest phase is started anyway in all other clients.
|
NOTE: The best overview of the upgrade status is provided by calling the "update_status.sh" command from the shell as the user "s3". This script can be called any time without any risks. |


Rest phase section
H_SECTION |
701- 999 |
Final operations in the Homedir, writing only takes place in the Homedir |
C_SECTION |
1301-1500 |
Data deliveries |
During the rest phase, rework is performed in the Abas installation.
Usually, the rest phase can be set up repeatedly.
All actions of the rest phase can also be performed later by a manual call, if required.
The rest phase is started automatically after the upgrade phase.


    o) Start the components-installer as s3 user to install all extra modules:
        (This step is NOT optional! Otherwise your installation will not be
        See upgrade instructions for further information.
6.7. ToDo: Review the message files of the upgrade and perform rework
After the upgrade the error messages and warnings can be found in specific files and directories:
-
install.mld:
Error messages (possibly required rework and information on the cause if the upgrade failed) -
install.wrn:
Warnings which you should take into account before using the system -
Messages:
The "Messages" directories in the Homedir and the client contain specific information (log files) about the upgrade programs that ran
An upgrade leaves behind directories with large data sets in the client. The data in these directories are required for analyses and repairs if an upgrade cancels with an error or causes inconsistent data structures. If the upgrade was successful, the following directories can generally be deleted:
-
MANDANT/startdat
-
MANDANT/zieldat
However, it is still recommended that you back up these directories on another hard disk or tape drive. This will enable you to analyze and repair database problems that may occur after the fact.
If no data inconsistencies occur in the area of the finin upgrade, you can also delete the following directory:
-
MANDANT/Messages/finin
The following directories can also generally be deleted if there is an acute lack of hard disk space:
-
MANDANT/Messages
-
HOMEDIR/Messages
Note that in the case of problems after the upgrade no further analyses can be performed if the files and directories specified above were deleted! Therefore, we recommend that you back up the directories externally.
|
NOTE: Before using the installation again all messages from "install.mld" must have been removed. Otherwise, error-free operation of Abas cannot be guaranteed! |
6.8. ToDo: Unlock the installation
If there are messages about urgently required rework in the "install.mld" file, the installation lock is not deactivated after the upgrade. This ensures that users cannot log in before all problems have been solved. The installation lock can be administrated via the help menu (login: hilfe).
6.9. ToDo: Reactivate the cron jobs of the server
Do not forget to reactivate the cron jobs deactivated before the upgrade:
-
Batch runs
-
Data backup
-
Docker containers

6.10. ToDo: Run the installation script for system services (as the user root)
# statt "/mnt1/abas/s3" Ihren Pfad verwenden!
/mnt1/abas/s3/Messages/rootInstall/installAllScripts.sh

You can find log files with information on the installation in the /tmp/ directory.
.Falls z. B. die Installation von iceDaemon nicht komplett durchgelaufen ist, finden Sie Hinweise zur Ursache in der Logdatei /tmp/iceDaemon_admin.sh.log
[root@cento7 abas]# ls -l /tmp/iceDaemon_admin.sh.log
-rw-r--r-- 1 root root 4694 24. Jul  12:13 /tmp/iceDaemon_admin.sh.log
Error messages when stopping iceDeamon (service stop … failed!) occur if iceDeamon has not been started yet and therefore cannot be stopped.
6.10.1. ToDo: Generate the tenant ID
How to create a tenant ID is described in this documentation.
6.11. ToDo: Integrate Dashboard into the GUI
-
In the Abas native GUI, go to the admin password definition and set the following under the "GUI" tab:
-
Set the start page adjacent to command overview to "URL"
-
Enter the URL for the dashboard start page under the URL subtab (e.g., http://<hostname>:<portnumber>/dashboard).
-
Click the Open in browser button to display the Abas Dashboard start page.
-
-
Log in to the Abas native GUI again. After the login, the Dashboard start page should be displayed on the right.
6.12. Set up Web Client (add-on)
If you would like to use the Web Client - our browser-based user interface for Abas - please follow the corresponding installation instructions.
7. Systemd
7.1. Basics
Experienced administrators can generally administer systemd services using the tools provided by the operating system. The script systemServices_admin.sh presented here serves to simplify the installation of systemd services that are required by Abas.
With this script you can:
-
View all installed Abas system services
-
Output the status of Abas system services
-
Generate EDP and DATMOD unit files
-
Install system services
-
Remove installed system services
 systemServices_admin.sh [-d] [-h <homedir] [--force]
                        --unit <unitname> [--port <port>] --type EDP|DATMOD|SERVICE
                        --build:    Build systemd unit files (EDP or DATMOD only)
                        --install:  Install systemd unit
                        --remove:   Remove systemd unit from OS (option --force required!)
                        --s3user <s3 user name>:  Name of Abas s3 user
                        --status:   Output systemd unit status
                        --list:     List all Abas systemd units (default)
                        --scriptdir <dir>:   Directory for the systemd unit files. Default:
                              HOMEDIR/Messages/rootInstall (if HOMEDIR is set and HOMEDIR/Messages exist)
                              /m/dev-29/mg1/tmp/systemdscripts (otherwise)
The script requires the specification of a unit name (--unit) and the type of application (--type). In some cases, the s3 user (--s3user) and the homedir (-h) are also required. The s3 user and the homedir can basically be adopted from the environment, as long as the s3 user’s current environment has been loaded. If no environment is available, these parameters must be passed.
eval $(sh ./denv.sh)
The unit name (--unit) is a freely selectable name under which the service is registered in the system. The names of the service files are also determined in this way. Note that the names of the system services must be unique. Two services with the same name cannot be installed/registered. For example, "edp" twice. The second system service must then be assigned a unique name, such as “edp2”.
There are three special variants for the application type (--type) in the Abas environment:
-
EDP (Abas system service "edp", unit file is generated)
-
DATMOD (Abas system service "datmod", unit file is generated)
-
SERVICE (all other Abas system services, unit file must be available as a template)
7.2. Administer systemd services
7.2.1. View all installed Abas system services
If you call the script without options or with --list, you will receive a list of all Abas systemd services.
You can list the system services as the root user or s3 user.
s3@debian:/mnt/abas/s3# ./bin/systemServices_admin.sh --list
   oder
s3@debian:/mnt/abas/s3# ./bin/systemServices_admin.sh
   Systemd services for Abas (s3)
===================================================
  s3-help-s3.service                                                                                    loaded active running   jetty for abas-lucene
  s3-ice-erp.service                                                                                    loaded active running   icedaemon
  s3-ice-s3.service                                                                                     loaded active running   icedaemon
  s3-rabbitmq.service                                                                                   loaded active running   RabbitMQ

   Other systemd services for Abas
===================================================
  countserver.service                                                                                   loaded active running   supervise license usage for Abas installations
  countserver.socket                                                                                    loaded active running   socket for countserver, the service supervising license usage in Abas.
  datmod.socket                                                                                         loaded active listening datmod socket
  edp.socket                                                                                            loaded active listening edp socket
If you were to execute the above call with a different "s3" user, system services would be missing from the output. The system services specified above are not installed for this second "s3" user.
root@debian:/mnt/abas/s3# ./bin/systemServices_admin.sh --list --s3user s4
   Systemd services for Abas (s4)
===================================================

   Other systemd services for Abas
===================================================
  countserver.service                                                                                   loaded active running   supervise license usage for Abas installations
  countserver.socket                                                                                    loaded active running   socket for countserver, the service supervising license usage in Abas.
  datmod.socket                                                                                         loaded active listening datmod socket
  edp.socket                                                                                            loaded active listening edp socket
  edp2.socket                                                                                           loaded active listening edp2 socket
7.2.2. Output the status of Abas system services
Systemd works with so-called “units”. The names of the system services listed under 2.1 are such “units”. For example, "s3-help-s3.service" or "s3-ice-erp.service"
The status of an Abas system service can be output as the root user or s3 user.
s3@debian:~$ ./bin/systemServices_admin.sh --unit s3-ice-erp --type SERVICE --status
Examine service (/etc/systemd/system/s3-ice-erp.service*):
  Check servicefile s3-ice-erp.service			exists!
* s3-ice-erp.service - icedaemon
     Loaded: loaded (/etc/systemd/system/s3-ice-erp.service; enabled; preset: enabled)
     Active: active (running) since Tue 2023-11-21 10:54:27 CET; 6 days ago
   Main PID: 504 (ssh)
      Tasks: 1 (limit: 3513)
     Memory: 2.3M
        CPU: 480ms
     CGroup: /system.slice/s3-ice-erp.service
             `-504 ssh -p 22 -o BatchMode=yes -o StrictHostKeyChecking=no erp@debian "cd ~ && eval \$(sh ./denv.sh) && \${HOMEDIR}/incrementalExport/daemon/bin/icedaemon-service -a start -s \${RABBITMQ_HOSTNAME} -t \${RABBITMQ_PORT} -v abas-iced-erp -e \$(envmake -x . -q MANDANTDIR) -f \${HOMEDIR}/iceDaemon/erp"
In this example, the system service is loaded and active (running).
7.2.3. Create and install a systemd EDP service
To install systemd services, you must be the root user (or a user who has sudo rights)!
To install a systemd service, there must be the necessary .service and/or .socket files. For the EDP and DATMOD system services, the systemServices_admins.sh script can generate these files itself. For all other services, they must be created in a different way and then passed to systemServices_admin.sh as a parameter so that the service can be installed in the operating system.
In order to create EDP and DATMOD services, the HOMEDIR of the installation must be known. This can be an existing installation (then integrate the s3 environment as the root user) or a new installation (then set the future HOMEDIR as a parameter).
Building the systemd scripts (EDP and DATMOD only!)
To build the unit files, the HOMEDIR, the s3 user and the port to be assigned are required. The systemd unit files can only be built for the EDP and DATMOD services using the systemServices_admin.sh script.
root@debian:/mnt/abas/s3# ./bin/systemServices_admin.sh -h /mnt/abas/s4 --s3user s4 --unit edp2 --type EDP --port 6555 --build
Systemd scripts were created in:  /tmp/systemdscripts

root@debian:/mnt/abas/s3# ls -l /tmp/systemdscripts
insgesamt 8
-rw-r--r-- 1 root root 107 28. Nov  14:43 edp2.socket
-rw-r--r-- 1 root root 296 28. Nov  14:43 edp2@.service
In this case, the two necessary files (edp2.socket and edp2.service) with the specified unit name edp2 are created in the temporary directory (/tmp/systemdscripts) because the specified homedir does not yet exist and no script dir was specified with --scriptdir.
Installation of the systemd service
For the installation, the scripts in this example are expected to be under /tmp/systemdscripts. All that is needed is the unit name and the type.
root@debian:/mnt/abas/s3# ./bin/systemServices_admin.sh -h /mnt/abas/s4 --s3user s4 --unit edp2 --type EDP --install
  Check template edp2.socket                ok
  Check template edp2@.service              ok
Check general server port (6555)            free
Examine service (/etc/systemd/system/edp2.socket*):
  Unit listening on port 6555               not found
  Check servicefile edp2.socket             new
  Check servicefile edp2@.service           new
Install systemd service "edp2.socket":
Created symlink /etc/systemd/system/sockets.target.wants/edp2.socket -> /etc/systemd/system/edp2.socket.
     Active: active (listening) since Tue 2023-12-05 13:12:47 CET; 5s ago
You can also specify the location of the system files to the installation script using the --scriptdir parameter.
Installation of a system service from provided templates
The system services for other Abas services (Help, IceDaemon, RabbitMQ, etc.) are generated during an installation/upgrade by the corresponding xxxx_admin.sh scripts and stored under HOMEDIR/Messages/rootInstall. In addition to the installation script, you will find two configuration files for each of these services under Messages/rootInstall.
Below you will find an example of an Abas system service (IceDaemon for the client erp). What is required here is the service file for the s3-ice-erp.service unit and a file with s3-ice-erp environment variables. The environment variables are loaded into the service file via the “EnvironmentFile” parameter.
The files were stored under the “/mnt/abas/s3/Messages/rootInstall” directory.
[Unit]
Description=icedaemon
After=network-online.target sshd.service s3-rabbitmq

[Service]
EnvironmentFile=/etc/sysconfig/s3-ice-erp
ExecStart=/bin/sh -c "ssh -p ${PORT} -o BatchMode=yes -o StrictHostKeyChecking=no ${USER}@${HOST} \"cd ~ && ${START_CMD}\""
ExecStop=/bin/sh -c "ssh -p ${PORT} -o BatchMode=yes -o StrictHostKeyChecking=no ${USER}@${HOST} \"cd ~ && ${STOP_CMD}\""
KillMode=process

[Install]
WantedBy=multi-user.target
USER=erp
HOST=debian
PORT=22
HOMEDIR=/mnt/abas/s3

START_CMD='eval \$(sh ./denv.sh) && \${HOMEDIR}/incrementalExport/daemon/bin/icedaemon-service -a start -s \${RABBITMQ_HOSTNAME} -t \${RABBITMQ_PORT} -v abas-iced-erp -e \$(envmake -x . -q MANDANTDIR) -f \${HOMEDIR}/iceDaemon/erp'
STOP_CMD='eval \$(sh ./denv.sh) && \${HOMEDIR}/incrementalExport/daemon/bin/icedaemon-service -a stop -s \${RABBITMQ_HOSTNAME} -t \${RABBITMQ_PORT} -v abas-iced-erp -e \$(envmake -x . -q MANDANTDIR) -f \${HOMEDIR}/iceDaemon/erp'
PAUSE_CMD='eval \$(sh ./denv.sh) && \${HOMEDIR}/incrementalExport/daemon/bin/icedaemon-service -a pause'
CONTINUE_CMD='eval \$(sh ./denv.sh) && \${HOMEDIR}/incrementalExport/daemon/bin/icedaemon-service -a continue'
The generated template files can then be installed as follows.
root@debian:/mnt/abas/s3# ./bin/systemServices_admin.sh --install --unit s3-ice-erp --type SERVICE --scriptdir /mnt/abas/s3/Messages/rootInstall -h /mnt/abas/s3
7.2.4. Removing Abas systemd services
To remove systemd services, you must be the root user (or a user who has sudo rights)!
To remove a systemd service, the unit name and type are expected as arguments. The removal is started via --remove and must be forced with the --force option.
root@debian:/mnt/abas/s3# ./bin/systemServices_admin.sh --unit edp2 --type EDP --remove --force
Remove systemd service "edp2.socket"
Removed "/etc/systemd/system/sockets.target.wants/edp2.socket".
7.3. List of commands for managing systemd services
For detailed documentation about systemd services, please read the relevant specialist literature from, for example, RedHat. Listed here you will find a few commands that are frequently required for the administration of "systemd".
    systemctl list-units
    systemctl list-sockets
    systemctl list-unit-files
    systemctl list-unit-files --type service
    systemctl list-unit-files --type socket
systemctl daemon-reload
systemd-analyze blame
    systemctl enable <Dienstname>
    systemctl start <Dienstname>
    systemctl stop <Dienstname>
    systemctl status <Dienstname>
7.4. List of Abas system services
The unit files can be generated for the following Abas system services.
Generated by help_admin.sh
Must be installed as the type SERVICE.
Generated by iceDaemon_admin.sh
Must be installed as the type SERVICE.
Generated by rabbit_admin.sh
Must be installed as the type SERVICE.
Generated by systemServices_admin.sh
Must be installed as the type EDP.
Generated by systemServices_admin.sh
Must be installed as the type DATMOD.
Is provided using the countserver.tgz delivery archive
It is installed using the shell script available in the archive.
8. Upgrade of the components
Abas 2024.Q3 is delivered with Components Version 1. You can find the documentation here: Components Version 1 Documentation
If you are upgrading from the Abas Installer Modules to the components, you will find the documentation in the following chapter of the component documentation: Upgrade from Installer Modules to Components
| Alternatively, you can download and install a newer version of the components. An overview of the available versions can be found here: Overview of component versions |
9. TROUBLESHOOTING
9.1. erpOSPRepare.sh
Script was run without or with incorrect parameters and should be restarted.
In the following, we presume that the erpOSPrepare.sh script has run through and that you want to start the script for a second time.
Note:
If a configuration file erpOSPrepare.cfg is in the bin directory, this cfg is always used. It has precedence over the input of parameters directly in the shell.
Note:
If the script is called with the wrong mount point or without this parameter, it will not help to run the script again with the correct parameters. The generated files and directories must be deleted first (back up beforehand).
It is easiest if you have created a snapshot of the status before calling the script. You can run the script with the new parameters after importing the snapshot.
-
If called again, the script displays the users and groups which already exist.
It marks them (in the monitor display) and deletes them when running the script (in installation mode -i). -
If directory and file names are changed in the second script call, the old directories and files will remain in place and will not be used further.
For example, if you specified the mount point using /u/ and now change it to /mn1/, the /u/ directory will remain in place and the /mnt1/ directory is recreated. Back up the old directory and then delete it.
If different mount points such as /u/ and /mnt1/ exist, it leads to conflicts and errors during the installation! -
ToDos for avoiding errors:
-
Check the Docker root directory (Docker root dir).
If you call the script for a second time using a different mount point, the Docker root dir is not automatically adjusted. You must amend the root directory as described under Troubleshooting Docker and Docker Compose standalone. -
Check the directory names in the files
/etc/xinetd.d/edp
/etc/xinetd.d/datmod
/etc/passwd (the user must be deleted and recreated if incorrect directories exist)
/etc/group
-
   Add root-user key                 [OK]
   Add own key                       [OK]
   Check ssh-login [root to s3]      [Failed]
Possibly error reason:  StrictModes on (change /etc/ssh/sshd_config and restart ssh server).
erpSSHPrepare.sh: ssh login for user s3 must work. Otherwise the installation can not be continued.
[root@redhat8 bin]#
This message is displayed if StrictModes is not set correctly in the sshd_config file. StictModes must be set to "no"! Follow the instructions under the sshd_config section.
Message: Could not add user "s3" to group docker
Message: e.g., user s3, rabbitmq cannot be added to group docker.
-
The message appears if Docker has not been installed.
ToDo:
-
Install Docker and Docker Compose standalone before installing Abas (if you want to use Multisite (RabbitMQ), Abas Service Planner and Abas PM).
-
Then manually enter the users s3 and rabbitmq in the group docker.
Message: No login possible for these users …
Kein login moeglich fuer diese Benutzer: rabbitmq
you must create both the login and the ssh key for the users named. There are two scripts on the installation CD to assist administration:
-
erpUserPrepare.sh and
-
erpSSHPrepare.sh
Run the scripts for the users as follows:
$ cd <CD-Installationsverzeichnis>
# Alternativ
$ cd $HOMEDIR
Create user "rabbitmq".
.Hier im Beispiel ist der Name der zugehörigen Gruppe "abas". Das muss evtl. geändert werden.
$ ./bin/erpUserPrepare.sh -u rabbitmq -g abas
If you use a user other than "s3", you must change it here! If you use a group other than "abas", you must change it here!
$ ./bin/erpSSHPrepare.sh -u root -g root
$ ./bin/erpSSHPrepare.sh -u s3 -s s3 -g abas
$ ./bin/erpSSHPrepare.sh -u rabbitmq -s s3 -g abas
9.2. Abas DMS installation
|
Warning: At the end of the installation process you must scroll up to see these messages. |
Message: Install ice daemon failed, Start rabbitMQ failed …
If the error message "Install ice daemon failed" or "Start rabbitMQ failed" is displayed after calling the install-unix.sh script, you can find information on the cause under /mnt1/abas/s3/Messages/ in the corresponding log file.
-
If the missing Docker installation is the cause, Docker and Docker Compose standalone must be installed.
-
If these errors occur even though Docker is installed, check if Docker starts automatically after a reboot. If not, you can find the instructions for the installation of Docker CE and Docker Compose standalone, including the Automatically start Docker section, in the appendix.
-
If RabbitMQ and IceDaemon are not installed yet, you must install them now.
9.3. Abas upgrade

Cause
Before the upgrade starts, a check is automatically performed to determine whether the database is closed correctly. This is done by writing a last check point in the database.
If the check point can’t be written in the database, the database is not ready for the upgrade.
Possible causes are:
-
The database was copied incorrectly
-
There is still an active login in the client (this can also be cron jobs or similar).
Remedy
To ensure a correctly closed database is available for the upgrade, check whether applications are still active in the client.
Then close all existing applications.
Afterward, perform a controlled startup of the database (log in to the client) and close the application again.
.Sobald der Prozess "datmod" beendet ist, ist die Datenbank bereit für das Upgrade:
[green]## Muss 0 liefern!#
psg datmod | wc -l
9.4. Docker and Docker Compose standalone
Message: Docker root dir failed
  Archname              ABAS_ARCHNAME                   x86_64_linux
  Javapath              ABAS_JAVAPATH                   /java-8-oracle
  Docker root dir                                       failed
A reason might be that the Docker root environment has been entered in the daemon.json as well as in the docker.service.
If you have newly created the daemon.json as the configuration file, you should restore the standard in the old configuration file /lib/systemd/system/docker.service. Your entry for docker-root must be commented out so that it is no longer used.
#ExecStart=/usr/bin/dockerd -g /mnt1/docker
ExecStart=/usr/bin/dockerd -H fd:// --containerd=/run/containerd/containerd.sock
# Variante a) Konfiguration im Docker-Daemon neu einlesen
#  Nur die neu gestarteten Docker-Container erhalten die geänderte Konfiguration
#  Alle laufenden Container sind nicht betroffen (haben weiterhin den alten Zustand)
*systemctl reload docker*

# Variante b) Docker-Daemon als root-Benutzer neu starten
#  ACHTUNG: Alle laufenden Container werden beendet!
#  Damit die Änderungen für alle Container wirksam werden, müssen die Container nach dieser
#  Operation neu erstellt werden. Die bestehenden Container neu starten reicht nicht aus!
*systemctl restart docker*
9.4.1. systemctl start docker triggers error message
The following error message is displayed when starting Docker: "Job for docker.service failed because the control process exited with error code. See "systemctl status docker.service" and "journalctl -xe" for details."
Check the docker.service configuration file as described in the above section Message Docker root dir failed.
Message: The base directory of Docker cannot be in the root area
Default: /var/lib/docker
As this area is too small, Docker must be moved to a larger partition. The guide for this can be found in the Change the Docker root directory section.
9.4.2. Docker containers are under /var/lib/docker.
When changing the Docker root area, there should not be any containers under /var/lib/docker, as it is a new installation.
If there are Docker containers under /var/lib/docker, these must now be shut down and the Docker service ended using "systemctl stop docker". Then copy everything from /var/lib/docker to /mnt1/docker.
rsync -ravHp –progress –stats /var/lib/docker /mnt1
Afterward, start Docker so that the change takes effect.
9.5. General
9.5.1. Cannot set hard link
With newer kernels (as of Kernel 3.6), a user can only set a hard link to a file if this file belongs to the user or they have read and write permissions for the file (either through group permissions or the permissions for users other than the owner or owner group).
If you have this type of kernel, there is the file
/proc/sys/fs/protected_hardlinks
echo "0" > /proc/sys/fs/protected_hardlinks
fs.protected_hardlinks=0
-R --type=ssh_home_t .ssh
Problems with internet access (wget, curl, etc.)
wget is not installed
yum install wget
erpOSPrepapre.sh or checkPackages.sh script reports errors
The script reports a lack of access to registry.abas.sh (URL registry.abas.sh is only used to test internet access)

-
Missing internet access can, for example, be due to a firewall
-
If you use proxy servers, set up a working internet connection.
-
For this, store the proxy configuration for http, https and ftp centrally in /etc/environment and in /etc/yum.conf (a detailed description can be found in the following section).
Set up the /etc/environment file (all operating systems)
#HTTP
http_proxy=http://ihrProxyserver:Port
HTTP_PROXY=http://ihrProxyserver:Port
#HTTPS
https_proxy=http://ihrProxyserver:Port
HTTPS_PROXY=http://ihrProxyserver:Port
#FTP
ftp_proxy=http://ihrProxyserver:Port
FTP_PROXY=http://ihrProxyserver:Port
|
NOTE After saving, must log out and back in in order for the changes to take effect! |
wget for RedHat
It is not sufficient to make an entry in /etc/environment for several commands. You must also enter a proxy server in yum.conf.

If there are still problems accessing the internet, you can also enter the proxy server in the wgetrc file.
http_proxy=http://ihrProxyServer:Port
https_proxy=http://ihrProxyserver:Port
ftp_proxy=http://ihrProxyserver:Port
Set up wget for Debian
Acquire::http::Proxy "http://ihrProxyserver:Port";
Acquire::https::Proxy "http://ihrProxyserver:Port";
Acquire::ftp::Proxy "http://ihrProxyserver:Port";
10. ATTACHMENT
10.1. Install Java (as the root user)
We highly recommend installing Java before calling the erpOSPrepare.sh script. This will save time-consuming manual rework after installation!
The installation of the free OpenJDK17 version is explained below. You can find currently approved Java versions for Abas on extranet.abas.de.
# Prüfen der Java-Version
java -version
openjdk version "17.0.6" 2023-01-17
OpenJDK Runtime Environment (build 17.0.6+10-Debian-1deb11u1)
OpenJDK 64-Bit Server VM (build 17.0.6+10-Debian-1deb11u1, mixed mode, sharing)
Set the Java path with a symbolic link to /mnt1/java17:
# Verzeichnispfad durch eigenen ersetzen!
ln -s /usr/lib/jvm/java-17-openjdk-amd64 /mnt1/java17
Note:
In the guide, the Java path is redirected to /mnt1/java17.
Advantage: For data backup, simply the /mnt1/ directory can be backed up. When copying an installation, it’s also easier to create the entire Abas installation by copying the /mnt1/ directory. Since the /mnt1/java17 directory is a symbolic link, the data backup must be performed with the appropriate TAR command, which also includes symbolic links in the TAR file.
10.1.1. Installation OpenJDK version 17
Java version 17 is required to operate Abas.
Debian 11
apt-get install openjdk-17-jdk
RedHat 8
yum install java-17-openjdk-devel
10.2. Installation Docker CE (Community Edition) and Docker Compose standalone
|
Without Docker, dashboards, Multisite (RabbitMQ), Abas Service Planner, and Abas PM do not work. |
Docker and Docker Compose standalone are mandatory for operating Abas.
It is not possible to install these two third-party tools automatically with erpOSPrepapre.sh or checkPackages.sh.
A system administrator must install these two programs on the Abas server before installing or upgrading Abas.
Check the necessary internet connection!
10.3. Docker installation
Official Docker website with installation guide
Always use the most up-to-date guide on the Docker website (which currently frequently changes):
-
Installation Docker CE (Community Edition) for Debian: https://docs.docker.com/install/linux/docker-ce/debian/
-
Docker installation for RedHat: There are several installation solutions for RedHat. Please read the information "Red Hat Enterprise Linux requires Docker Enterprise Edition" (in German and English) in the Community from 6/2/17 with amendment from 7/6/17 and 9/7/17.
10.3.1. Automatically start Docker (Start docker on boot)
Docker CE (Community Edition) must also be set up so that it is automatically restarted after a reboot.
For call, see:
https://docs.docker.com/install/linux/linux-postinstall/#configure-docker-to-start-on-boot -→ "Configure Docker to start on boot" section.
10.3.2. Set HTTP proxy for Docker CE (Community Edition) (if you work with proxy)
If you use http/https proxies, you must create an appropriate configuration file.
Follow the guide on the Docker website: https://docs.docker.com/config/daemon/systemd/#httphttps-proxy -→ "HTTP/HTTPS proxy" section.
There, you can find a detailed description of how to create a new directory and a configuration file and which content the configuration file must have.
After entering your proxy server in the configuration file, proceed with the next step:
|
NOTE If you restart the Docker daemon, ALL running containers on the server end. |
systemctl daemon-reload
systemctl restart docker
systemctl show --property=Environment docker
If there is no output, the proxy entry is not correct or the configuration file is not in the correct location.
10.3.3. ToDo: Change the Docker root directory
Docker stores its data and containers under /var/lib/docker by default.
As this area is too small, the Docker root area must be moved to a larger partition. The erpOSPrepare.sh script cancels the installation if you did not change the Docker root.
For current Docker versions (from 17.x.x), the old configuration of the Docker root environment (in /etc/default/docker or /lib/systemd/system/docker.service) can no longer be recommended. With every Docker upgrade, these files are replaced by the standard Docker values. Individual changes will be lost, which may lead to Docker being moved back to the (too small) standard root partition.
10.3.4. Change root directory
mkdir -p /mnt1/docker/engine
vi /etc/docker/daemon.json
{
"data-root":"/mnt1/docker/engine"
}
10.3.5. ToDo: Limit the log output of Docker
Docker containers may write much log output to the hard disk. To prevent that the hard disk becomes full (Abas may stop completely!!) limiting the logging of Docker is recommended.
Amend the "/etc/docker/daemon.json" file so that it looks like this:
{
"data-root":"/mnt1/docker/",
"log-driver": "json-file",
"log-opts": {
"max-size": "100m",
"max-file": "5"
}
}
-
max-size: Specify the maximum size of a log file here (100MB in the example).
-
max-file: Enter the maximum log files to be saved here (5 in this example) This results in a maximum disk space per container (!!) of 100MB * 5 = 500MB for logging.
You can find the log files in the following directory:
/path/to/docker/engine/containers/<container-id>
The names are formed as follows:
<container-id>-json.log ⇐== active log file
<container-id>-json.log.1
<container-id>-json.log.2
etc.
Thus, the default logging is set for all containers. Note that every container can be started with individual log options which overwrite this default logging.
See also: https://docs.docker.com/config/daemon/
10.3.6. ToDo: Restart the Docker daemon
If you make changes to the Docker configuration (e.g., the daemon.json mentioned above), you have to restart the Docker daemon for the changes to take effect.
First try a "reload" to just read in the configuration again. If you are sure that all Docker containers that are still running belong to the installation you are administering, you can safely execute a "restart" or "stop" and "start".
|
NOTE If you restart the Docker daemon, ALL running containers on the server end!! |
systemctl daemon-reload
systemctl stop docker
systemctl start docker
systemctl status docker
Active: active (running) since ...
docker info | grep Root
Docker Root Dir: /mnt1/docker
10.3.7. Run Docker as non-root user
You don’t need to do anything (the following explanation is for understanding only):
Docker must also run under the user s3. The user s3 will be automatically added to the docker-group by the erpOSPrepare.sh script.
If the user s3 is missing in the docker-group, run the command below.
-
Docker has already been entered in /etc/group/ by the Docker installation.
-
The following command is executed as the user root by the erpOSPrepare.sh script:
usermod -aG docker s3
10.4. Installation Docker Compose standalone
Always use the current installation guide on the Docker website:
-
It is necessary to install the linked standalone version of Docker Compose standalone
-
Check the Docker Compose standalone version (the Docker Compose standalone version must be displayed afterwards, without error messages!)
docker-compose --version
If the call with curl does not work
'You can start the call with pip. epel-release and python-pip may have to be installed beforehand.
|
*Warning: Install Docker Compose standalone only with curl or pip and never as a shipping container! |
yum install epel-release
yum install -y python-pip
pip install docker-compose
yum upgrade python*
10.5. Explanation of the erpOSPrepare.sh script
What does the erpOSPrepare.sh script do?
-
You can use the script for new Abas installations (call with -i) and upgrades (call with -u).
-
It is located in the bin directory: /mnt1/tools/abas/CDftp-2200r8n02/bin/.
-
The script creates all required users.
-
With the value "-", you can define for certain parameters that their values are omitted (e.g. certain users are not created).
-
The script creates ssh keys (each below the corresponding directory), which are named abas_install so that there is no conflict with existing keys.
-
The script checks the completeness of the packages and installs the missing packages, with the exception of third-party software, e.g., Java, Docker, and Docker Compose standalone.
-
The script creates necessary system files with the preferred entries and directory names, which you previously had to change manually, e.g., xinet.d/edp ; xinet.d/datmod.
-
You can pass different parameters to the script to customize the installation according to individual requirements.
-
The Mountpoint parameter and Java path must always be specified.
-
You can adapt parameters in the erpOSPrepare.cfg configuration file, which the script automatically reads. This is useful if you, e.g., pass many parameters or perform many installations with the same parameters .
-
The "erpOSPrepare.sh" script calls multiple subscripts, which fulfill the tasks described above.
-
checkPackages.sh (checks package lists and installs them)
-
distritest.sh (checks operating system)
-
erpSSHPrepare.sh (creates ssh keys)
-
erpUserPrepare.sh (creates users and groups)
-
-
Subscripts can also be called separately as necessary, for example, if additional users or ssh keys should be created (examples can be found in the appendix under "Additional scripts for user and SSH installations").
-
"erpOSPrepare.sh" requires the commands wget, netstat, addgroup. If these are not yet available on the system, it is attempted to automatically install them afterwards.
-
The script checks whether access to the internet is possible through a proxy server, for example. Access is necessary to retrieve missing packages from the internet.
-
The script checks the settings in sshd_config and of selinux.
Explanations and examples of the erpOSPrepare.sh script
General call (as the user root)
ABAS_JAVAPATH=/path/to/java [Parameter...] ./erpOSPrepare.sh -u -h /path/to/homedir
-i  verwenden für Neuinstallation
-u  nur für Upgrade verwenden
In the next chapter, you can find a detailed description of all parameters of erpOSPrepate.sh as well as additional scripts for the creation of users and ssh keys.
Call examples
Example 1 (standard)
-
"mnt1" is used as the mount point
-
Javapath is set to /mnt1/java8 in this example here. Adjust this path accordingly.
-
Passwords for s3, demo, erp etc. are stored in a separate file /mnt1/tools/abas/CDftp-2200r8n02/bin/erpOSPrepare.passwd.
cd /mnt1/tools/abas/CDftp-2200r8n02/bin/
ABAS_DIRNAME_MOUNT=/mnt1 ABAS_JAVAPATH=/mnt1/java8 ./erpOSPrepare.sh -u -h /path/to/homedir
Example 2
ABAS_DIRNAME_MOUNT=/mnt1 ABAS_JAVAPATH=/mnt1/java8 ABAS_PORT_EDP=6551 ./erpOSPrepare.sh -i
Example 3
In addition, call using the parameter REMOVE_PASSWD=1 if the passwords are not to be generated automatically.
.Damit wird den Benutzern kein Passwort zugewiesen -→ nicht empfehlenswert!!!
ABAS_DIRNAME_MOUNT=/mnt1 ABAS_JAVAPATH=/mnt1/java8 REMOVE_PASSWD=1 ./erpOSPrepare.sh -i
Description of the parameters for erpOSPrepare.sh
You can use the parameters below when calling the erpOSPRrepare.sh script. You can keep the standard values or assign custom values to the parameters. The explanation in the right column refers to the entries in the "Values" column. If you use other values, for example, mount point is not /mnt1 but /u, you must adjust the description text to your value.
Mount point |
ABAS_DIRNAME_MOUNT |
/mnt1 |
|
Base directory |
ABAS_DIRNAME_BASE |
abas |
|
s3 directory |
ABAS_DIRNAME_S3 |
s3 |
|
nobackup directory |
ABAS_DIRNAME_NOBACKUP |
Important:
If you work with multiple clients, they block each other. |
|
INSTALLPATH=/mnt1/abas/s3 |
|
||
Default password |
ABAS_DEFAULT_PASSWD |
abas |
|
s3 user |
ABAS_USERNAME_S3 |
s3 |
|
ruby user |
ABAS_USERNAME_RUBY |
help user |
ABAS_USERNAME_HELP |
1. hilfe |
Regarding point 1 * The preset value is "hilfe" * The HOME of the "hilfe" user is in the s3 directory. It is necessary for administrative purposes such as restart, client copy, etc. * The user "hilfe" will be created under /etc/passwd and has its HOME in the /mnt1/abas/s3 directory * The user "hilfe" does not have an ssh key Regarding point 2 * The user will not be created with the value "-". |
Extra user |
ABAS_EXTRA_USERNAMES |
* Can be used to create customer-specific users |
icedaemon user |
ICEDAEMON_USERNAME |
|
s3 |
* User under which IceDaemon is administrated. * Usually, this is always the user s3. |
rabbitmq user |
RABBITMQ_USERNAME |
1. rabbitmq |
Regarding point 1 * The preset value is "rabbitmq" * The user is required for the installation of RabbitMQ, for example, for the use of Multisite. * The user "rabbitmq" will be created in /etc/passwd * ssh key will be recorded in: /mnt1/abas/rabbitmq/.ssh/ Regarding point 2 * The user will not be created with the value "-". |
rabbitmq port |
RABBITMQ_PORT |
5672 |
* Belongs to RabbitMQ installation * The preset port is 5672. * The port can be changed. |
rabbitmq system file |
RABBITMQ_SERVICEFILE_ BASENAME |
rabbitmq |
* The preset value is "rabbitmq". * The name can be changed. |
docker container name: s3_rabbitmq |
|
* This is only an informative parameter so you know the name of the Docker container and can find it again. * The name is composed of ABAS_USERNAME_S3 and RABBITMQ_SERVICEFILE_BASENAME |
Client directories |
ABAS_CLIENT_DIRNAMES |
|
erp demo empty |
* Generally, three clients erp, demo and leer will be created. * Further clients can be added separated by a space; for example, erp demo leer erp-test* Important: The number of client directories and client user names must always correspond. |
Client user names |
ABAS_CLIENT_USERNAMES |
1. erp demo leer |
Regarding point 1 * Generally, three users erp, demo and leer will be created in /etc/passwd
* ssh keys will be recorded in Regarding point 2 * No user will not be created with the value "-". |
Batch user names |
ABAS_CLIENT_ USERNAMES_BATCH |
1. Value "-" |
Regarding point 1 * If you preset the variable with the value "-", no batch user is created for security reasons. Regarding point 2 * If required, you can specify the three users berp, bdemo and bleer, which will then be created automatically in /etc/passwd |
DMS user |
DMS_USERNAME |
1. dms |
Regarding point 1 * The preset value for the user of the document management system is dms
* The user is required to install Abas DMS.
* The user "dms" will be created in /etc/passwd
* The ssh key will be recorded in: Regarding point 2 * The user will not be created with the value "-". |
DMS group name |
DMS_GROUP_NAME |
dms |
* Is the group name of thje DMS user |
abas group number |
ABAS_GROUP_ NUMBER |
<computed> |
* Group number of the DMS group |
DMS path |
DMS_BASEPATH_PATH |
/mnt1/abas/s3 |
* The exchange directory for the Abas DMS archiving is created under /mnt1/abas/s3. |
DMS basename |
DMS_BASEPATH_NAME |
abasdms |
* The preset value for the exchange directory is "abasdms". * Unlike the Home directory of the user "dms", "abasdms" is used to store abas-specific data, for example, index files, PDF documents, etc., which will be transferred to the DMS. |
DMSPATH=/mnt1/abas/s3/abasdms |
|
* This is only a notification parameter that displays the exchange directory for abas DMS. * The directory is composed of the above values of DMS path and DMS base name. * This directory will later be released with special permissions per SAMBA. |
Full text user |
VTS_USERNAME |
|
1. vts 2. Value "-" |
Regarding point 1 * The preset value is "vts"
* This user is required for the full text search installation and will be created automatically The full text search itself is not installed per default
* The user "vts" will be created in /etc/passwd
* The ssh key will be recorded in: Regarding point 2 * The user will not be created with the value "-". Call example: VTS_USERNAME=- |
Help port |
HELP_PORT |
12580 |
* The default value is 12580. * The port is valid for one installation. * An additional individual port is required per installation |
abas group name |
ABAS_GROUP_ NAME |
abas |
* The preset value is "abas". * Group will be created in /etc/group |
abas group number |
ABAS_GROUP_ NUMBER |
<computed> |
* The next free group ID will be used automatically. * Value will be assigned to the group "abas" in /etc/group * You can assign your own custom gorup ID |
Archname |
ABAS_ARCHNAME |
x86_64_linux |
* Identifies the architecture of the operating system * Cannot be changed! |
Javapath |
ABAS_JAVAPATH |
must be set individually, e.g., /mnt1/java8 |
* Value is not preset * Value remains empty if you do not pass the parameter upon calling the script * The Abas installation will not work without specifying Javapath! * Specify the path under which Java was installed or should be installed. * The path will be automatically written in all necessary files by the script. If you do not specify a path, you will need to do this manually afterward (not recommended)! |
Docker root dir |
|
* Checks where Docker was installed * Docker root directory must be moved from /var/lib/docker to a data partition, as there is not enough space under /var/lib/ (a guide for this is provided here "Docker" "Changing the Docker root directory" section) .* Installation cancels if Docker root is under /var/lib/docker |
datmod port |
ABAS_PORT_ DATMOD |
|
48392 |
* The port can be changed. |
Service file for port 48392: /etc/xinetd.d/datmod |
|
edp port |
ABAS_PORT_EDP |
||
6550 |
* The port can be changed. |
Service file for port 6550: /etc/xinetd.d/edp |
Legend of the erpOSPrepare.sh output
-
For user: * indicates that the user exists and ssh login is possible
-
For user: ! indicates that the user exists but ssh login failed
-
For user: X indicates that the user-home is not part of abas-base (/mnt1/abas) but ssh login is possible
-
For user: Y indicates that the user-home is not part of abas-base (/mnt1/abas) and ssh login failed
-
For directory: * indicates that the directory exists
-
For directory: # indicates that the directory exists and is a client directory (Allowed in upgrade only)
-
O marked lines: Some groupnames or groupnumbers already exist. See O marked lines! This is an optional function. It is not necessary to change these values. However, it can be a security risk if you want to separate the installations.
-
R means: a RabbitMQ container with the value displayed in the line already exists. RabbitMQ and IceDaemon will not be installed! If you require multiple installations with RabbitMQ, you must change the value of RABBITMQ_CONTAINER_PREFIX when calling erpOSPrepare.sh.
Example: Call RABBITMQ_CONTAINER_PREFIX=abastest
.erzeugt als Containernamen abastest_abasrabbitmq_1
    rabbitmq container RABBITMQ_CONTAINER_PREFIX abastest
    rabbitmq systemfile RABBITMQ_SERVICEFILE_NAME abas-rabbitmq
    docker container name: abastest_abasrabbitmq_1
10.6. Additional scripts for user and SSH installations
The complete installation requirements can be created using the erpOSPrepare.sh script. In order to, for example, easily create missing users or missing ssh keys during the upgrade, the script uses the two administration scripts "erpUserPrepare.sh" and "erpSSHPrepare.sh". These scripts can also be used individually to specifically create new users.
Create a user for Abas: erpUserPrepare.sh

Example: Create new user
# Als root-Benutzer einloggen

cd /mnt1/tools/abas/CDftp-2200r8n02/
# Alternativ
cd $HOMEDIR
Create the user "rabbitmq".
.Hier im Beispiel ist der Name der zugehörigen Gruppe "abas". Das muss eventuell geändert werden.
$ ./bin/erpUserPrepare.sh -u rabbitmq -g abas

Create the ssh keys required for Abas: erpSSHPrepare.sh

Example: ssh keys for new user
# Als root-Benutzer einloggen

cd /mnt1/tools/abas/CDftp-2200r8n02/

# Alternativ:

cd $HOMEDIR
Create ssh key for user "rabbitmq".
/bin/erpSSHPrepare.sh -u rabbitmq -s s3 -g abas

10.7. Temporary upgrade files
If hard drive capacity is a problem, the temporary upgrade directories can be deleted. We do not recommend this. When the next upgrade is started these directories will be deleted and recreated. This disk space will be required again. If the directories are deleted, questions regarding the last upgrade can no longer be answered.
Some errors are only recognized late after the upgrade, especially missing, rarely required translations. Particularly dangerous is also the deletion of the ofil directory in the client directory which also contains the FOPs of older previous versions.
The missing of FOPs which are only required once a year, such as stocktaking, year-end closing etc., may only be noticed much later after the upgrade.
HOMEDIR
The following directories in the HOMEDIR can be deleted after careful consideration.
-
rmdir
-
update
-
old # WARNING: old dictionaries
Clients
-
zieldat
-
schema
-
ofil # WARNING: old FOPs, also from previous versions
clean_upgrade.sh
10.8. Upgrading a copy of the installation (change of computer, test upgrade)
10.8.1. Important information for upgrades with change of the computer
If you
-
have installed a new computer for the upgrade and
-
have assigned a new name to the old computer and
-
the new computer has been provided with the name of the old computer, you
must rename the following files on the old computer
-
$HOMEDIR/homedir.env and
-
$HOMEDIR/denv* and denv.* files in all clients of the old computer have to be removed.
-
cron must be deactivated (/etc/init.d/crond stop)
Otherwise it might happen, when an application program is unintentionally run on the old computer, that data will be written to the new database - which might have really adverse effects. The unintended program start may be caused by a computer with old cache information or because of a start via crond, for example.
|
WARNING: You must check all files and directories from HOMEDIR/homedir_keepfiles. These files and directories are not taken into account in the case of a "zugriff.sh"! You must manually correct the file permissions (user:group) using the "chown" command. This applies in particular to the ".ssh" directory. Without this adjustment, your test installation cannot be run. An upgrade cannot be performed. |
10.8.2. Copy an installation


|
IMPORTANT: If the backup lock is not removed again using allein.sh -E, no GarbageCollection can run and it is inevitable that the disk will become full. A GarbageCollection is no longer possible on a full disk. It is therefore necessary to install a larger disk. |
This copy command with rsync can be canceled and executed again at any time, if the backup lock is reset or remains set in all clients. The command does not require any shares or NFS mounted directories. The files to be copied are copied very quickly through the ssh tunnel, in the case of GBit networks at full disk speed (e.g., 30 MB/s, the theoretical upper limit is 100 MB/s in a GBit network).
Important points:
-
Please ensure that the backup lock is removed again after copying, as otherwise there can be no GarbageCollection and the hard disk will become full.
-
Copying via rsync mostly deletes the target directory "s3test@<target computer>:.." recursively. Please check the target carefully before copying.
-
When copying, also take into account databases/files/clients or symbolic links stored in different disk areas.
-
If you use another command for copying, also take into account the files whose names begin with '.´.
-
Use a command when copying via NFS, call copy on the new computer (on which the target directory is located). NFS-read outperforms NFS-write.
-
Log all errors in files when copying, e.g., cd <old directory> find . -print 2>find.err | cpio -pdmu <new directory> 2>cpio.err.
-
-
Go to the HOMEDIR of the target computer. Create the rmdir directory, unless it already exists. Move the .profile file to rmdir. Only then can you log in again after copying.
Set up an active ASCII environment of the old version
If the programs of the old version can be run generally, a functional environment of the old version can be created. This is an advantage if incompatibilities of the individual variables have to be removed before the upgrade, for example. You can then make the changes directly there without having to change the real installation and then copying it.
Old 32-bit programs on 64-bit operating systems
In most cases 32-bit installations (abbreviation linux) can be set up on 64-bit computers (abbreviation x86_64_linux). In the case of a test upgrade or computer change during the upgrade, you can "fake" the architecture using the following command. However, in regular operation, such an intervention will invalidate the warranty.
login: s3
$ mv bin/archname.sh bin/archname.sh.orig
printf "#\041/bin/sh\necho linux\n" > bin/archname.sh; chmod 755 bin/archname.sh
You also need the 32-bit version of libncurses.so.5. On Debian the package is called "lib32ncurses5".
Please check with
$ ldd linux/pa | grep libncurs
if the library is then found.
Making old programs - Abas 2004r4 and older - runnable
With a little luck, also 2004r4 or older versions will run on current operating systems.
Regardless of whether the new computer has a 32-bit (architecture abbreviation "linux") or 64-bit (architecture code "x86_64_linux") operating system, you must provide libncurses.so.4 as a symlink on libncurses.so.5.
Test:
$ ldd <HOMEDIR>/linux/pa | grep libncurs
libncurses.so.4 ⇒ not found # This will only be valid when the name of the library contains a "4".
|
NOTE: |

Set up the ASCII program environment
In most cases you can make the old program environment runnable on the new computer.
When changing from 32-bit programs to 64-bit programs you must execute the red lines in addition.
If you want to keep the 32-bit programs on the 64-bit computer, you must proceed as described in the above box "Old 32-bit programs on 64-bit operating systems" first.
You can set up the environment of the old installation on the new computer as follows:


|
NOTE: "envgen.sh" only sets up the ASCII environment. To be able to use the GUI, see the section Read the innovations and expansions information, plan rework. |
10.8.3. Set up a non-executable environment of the old version

|
NOTE: * If the files denv.dat or denv.sh do not exist in the HOMEDIR, the upgrade does not lock the old version. Conversely, denv.dat and denv.sh must not exist if the old version is not installed correctly or cannot be run in the HOMEDIR. Otherwise the upgrade will fail after section H_SECTION=200 when trying to lock the old installation with the message* |
D: Beim Upgrade dürfen keine Anwendungen aktiv sein.
E: No client processes allowed during upgrade.
If a runnable copy if the installation is concerned, you should keep denv.* in the HOMEDIR and in all clients. Otherwise you must make sure that no one can log in while the upgrade is being performed. If someone logs in anyway (or starts a cron job), the upgrade usually has to be repeated.
Carrying out the upgrade:
As has been described for the original installation.
10.9. Upgrade of a client
A client with an earlier version can be adopted into an existing HOMEDIR when upgrading.
The prerequisites for this are:
-
The client version can generally be upgraded to the one of the HOMEDIR, see column "Upgrade from version" in the Abas versions overview.
-
A new login (user account) was created for the new client.
-
The user account of the client has the same group as the account of the HOMEDIR and the accounts of the already existing clients.
-
The new client was entered in mandantdir.env.
-
The login in the clients was locked, the Windows share of the win directory was removed. The upgrade of an individual client can only be carried out without a lock due to technical reasons. A login during the upgrade must be strictly avoided.
Commands for upgrading an individual client
# Als s3-User einloggen
# In das Mandantenverzeichnis wechseln. Annahme: der neue Mandant mand liegt parallel zum s3-Verzeichnis

$ cd ../mand

# WICHTIG:  Jetzt Mandanten im Originalverzeichnis auf dem Originalrechner mit Sichernsperre sperren!

# aktuelles Verzeichnis überprüfen, da es vom folgenden rsync-Befehl rekursiv gelöscht wird

$ pwd

# Die folgenden Befehle Kopieren den Mandanten vom alten auf das aktuelle Verzeichnis, auch über Rechnergrenzen hinweg.

# Entscheiden Sie sich für EINE der beiden Versionen. Wichtig: der "/" am Ende von "mand/"

# Version 1: Alle zu kopierenden Dateien ausgeben, Fehler in rsync.err protokollieren

$ rsync -avH --delete -e ssh s3@<Quellrechner>:../mand/ . 2>rsync.err | tee xh

# Version 2: Gebe nur Fehlermeldungen aus und keine Namen der kopierten Dateien

$ rsync -aH --delete -e ssh s3@<Quellrechner>:../mand/ . 2>&1 | tee xh

# WICHTIG: Jetzt SICHERN Sperre im Originalverzeichnis auf dem Originalrechner wieder aufheben!

# Environment aktualisieren

$ rm -f denv.*  && envmake -B

Ab Version 2016r3

$ su  <mandanten-user>                   # Mandantenbenutzer werden

$ eval $(sh ./denv.sh)                   # Für das Upgrade Umgebung setzen

$ rm -f status                           # evtl. vorhandene alte Datei "status" löschen

$ sh -x update_mand.sh -pur 2>>status    # Upgrade des Mandanten durchführen und in "status" protokollieren

$ zugriff.sh -m $(pwd)                   # Zugriffsrechte setzen.
10.10. Information on screen customization
Screen Merger is a tool that is used during an Abas upgrade. It helps you to merge your customized screens with the new standard screens of the current Abas version.
10.10.1. Tasks of Screen Merger
During the upgrade, your individual adjustments to the database screens are compared with the current standard screens. Screen Merger takes on the following tasks:
-
It recognizes in which subscreens or tabs of your screen adjustments have been made.
-
It inserts these customized areas into the new standard screen and marks them there with a plus sign (+) for adopted tabs, or with "<original content>" for newly inserted tabs.
-
Since the Abas GUI can only display one table, tables are also compared and merged column by column. The columns adopted from the customized screen are also marked with a plus sign.
(Line zooms are technically implemented as subscreens and are treated accordingly).
This procedure ensures that both your customizations and the new standard functions of the current Abas version are available in the screens. This allows you to compare both versions clearly and decide which changes you want to apply.
10.10.2. Validation and adaptation of the screens after the upgrade
Screen Merger is executed automatically as part of an Abas upgrade. After a successful upgrade, the database screens are merged and generated and can therefore be used in the Abas GUI without further intervention.
However, customized screens may require manual adjustments to achieve an optimal result. The starting point for this work is the report in which Screen Merger lists the adjustments that have been made for each screen and provides recommendations for the next steps.
This report can be found in $MANDANTDIR/Messages/screen-merger/screenMerger-result-*.txt.
The following steps are required:
-
Check the merged screens: Open the screens created by Screen Merger in the Abas GUI or in Screen Designer and compare the display with your requirements. The Screen Merger report helps to identify and categorize changes.
-
Edit the merged screen in Screen Designer:
-
Remove superfluous elements that resulted from merging.
-
If necessary, make further adjustments to the screen.
-
-
Generate the customized screens: Once you have made all the adjustments, the modified screens must be regenerated.
10.10.3. Frequently asked questions (FAQ)
Why is the merge process not fully automated?
Screen Merger focuses on merging the screen information from standard and customized screens. The decision as to which adjustments should be adopted often requires a professional assessment and cannot be fully automated for this reason or for technical reasons.
What do I do if a screen generated by Screen Merger is unusable?
Before Screen Merger is executed, all screens are saved in the $MANDANTDIR/screens-orig directory. This means you can use the unchanged customized screen directly or adapt it to your requirements in Screen Designer.
How are screens from additional databases or similar handled?
Standard screens of additional databases generally serve as placeholders and are not usually intended for direct use. Screen Merger therefore skips the merging of these screens with your individual adjustments, i.e. the customized screens are adopted unchanged. The same applies to screens of certain add-ons, such as the Process Suite.
How are duplicated message keys handled?
Customized screens can contain message keys (keys for texts) that also exist in the standard screen. If these keys have different values, the merged screen would display incorrect messages. To prevent this, Screen Merger identifies such duplicate keys and replaces them in the customized screen with newly created unique keys (UUIDs).
Where can I find further information?
You can find further information on Screen Merger in the $MANDANTDIR/screen-merger/README.md file.
10.11. hostname and HOST_HOMEDIR
hostname
Fully qualified domain name
hostname -f
To determine it, the IP address of "hostname" is queried and then the computer name for the IP address. In the simplest case this is done via the file /etc/hosts. What is important here is the sequence of the entries: IP address, fully qualified name, host name
/etc/hosts:
127.0.0.1 localhost.localdomain localhost
192.168.5.50 [underline green]#mars.s3.abas.de# mars
$ hostname
mars

$ hostname -f
mars.s3.abas.de
|
NOTE: A computer can be addressed by multiple IP addresses and multiple fully qualified names, but has exactly one host name in the kernel - in our case "mars". |
homedir.env
The variable HOST_HOMEDIR is set in the homedir.env file. It determines on which computer the database is started. If "hostname" und "HOST_HOMEDIR" differ, an attempt is made to build a connection to "HOST_HOMEDIR" and to start the database there.
However, the local communication between database (datmod) and application (eksanw) using the domain sockets is much faster than using the network. hostname and HOST_HOMEDIR should be the same also for this reason.
|
NOTE: Before the upgrade is started "hostname" and "HOST_HOMEDIR" must be checked. If both values do not correspond, the upgrade may stop in a problematic phase which cannot be restarted. |
10.12. Handle errors in the upgrade
Troubleshooting

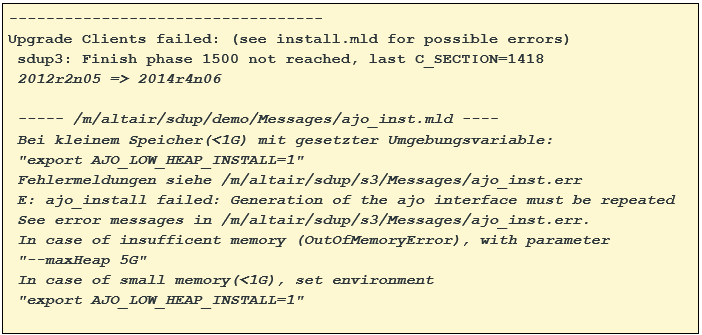
Analysis
Evaluate error messages
| Message | Meaning |
|---|---|
Upgrade unfinished |
The upgrade is not (yet) finished. |
Clients fully upgraded: (see install.mld for possible reworking)sdup2: Client finished |
All upgrade steps in the client sdup2 have finished running, there may still be necessary work according to the listed ".mld" files, here, e.g., for the screens. |
Upgrade Clients failed: (see install.mld for possible errors) sdup3: Finish phase 1500 not reached, last C_SECTION= |
The upgrade failed in client "sdup3", ajo_inst.mld references ajo_inst.err. The error named there must be resolved, then the upgrade can be restarted. (Call with the complete path: /…./CDftp-…./update-unix.sh ) |